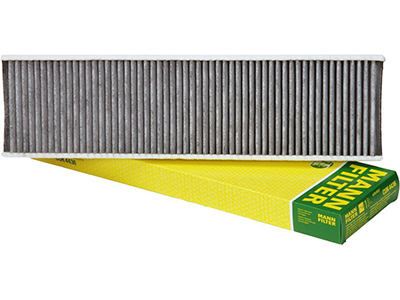
Cabin Air Filter
Replacement of Cabin Microfilter for AC and Heating System
By TMTR May 7, 2018
O
verview ...
Warm weather finally arrived, so I turned on the Air Conditioning in the Mini Cooper and was greeted by cool air, but also a pungent odor coming from the AC vents. I had a new cabin air filter from Mann that I purchased awhile ago, so I decided to change out the cabin air filter. I got the mini about 9k miles ago. I'm not sure if the cabin air filter was changed prior to me getting the car, so at the least it had 9k miles on it and over 18 months; at the most, it had over 22k miles and over 4 and a half years.
Warm weather finally arrived ...
I ... was greeted by cool air, but also a pungent odor coming from the AC vents.
Changing the Cabin Filter ...
I consulted my Bentley manual for instructions. Basically, for my vehicle, which is a 2103 Mini Cooper S, the process is pretty easy. Under the glove compartment is a swing door that, when closed, is horizontal and a few inches above the floor of the car. The swing door is a little more towars the front of the car then the glove compartment. There are two screw holes on the left and right sides of the door, one each per side, as well as a plastic latch thet runs the length of the door from left to right. My door had no screws. The Bentley manual mentioned to remove the screws if present. With no screws in place, to seing open the door, you need to unlatch the plastic latch. It's a still plastic that stays in place, so the easiest way to unlatch it so that you can open the door, is to use two flat head screw drivers and gently pry in two spots (one towards the left from center and one towards the right from center) until the latch unlatches and you can swing the door down. The hinge is on the opposite side of the latch. Once you swing the door down, you'll see the end of the filter and if you look up, you'll see that the filter goes along a double curved groove. Slide out the old filter, by pulling on the bottom right end of the filter and if you want, you can twist it to free it from the groove on one side if you don't wan to slide the whole thing down. There will most likely be some dirt that falls out from the top of the filter, which is essentially, the ouside of the filter and the Heating and Cooling air intake system.
I cleaned the entire filter box, first with a mild solution of Top Job and water, then I let it dry and then I wiped it down with lysol disinfectant wipes to get out an funk that may have accumulated inside. I reached up into the box to get as much area as possible. If you reach up and to the left, you will feel the fan. Definately do not work on this with the car on or any chance of the heat or AC coming on. Once the disinfectant dried, I wiped the whole thing down with a wet rag with just clean water to get any disinfectant residue off.
To put the new air filter in, I waited till the box was completely dry. Definately, you want the groove track to be completely dry. Be careful handling the filter in two ways. First do not squeeze it from the sides as you will crush the folded part which conatins the activated charcoal. Also, when pushing in the new filter, just push using both hands on the side, pushing in the direction of the movement of the filter. So basically, do not puch on the filter at the folds as you will crush the first few folds. Not a huge deal, but you might as well handle it right. I curved the bottom end of the filter towards the left so it was in a sort of semi circle arc and simply fed the filter into the box, making sure to have the filter in the grooves on both sides. It slides up easily. It should go all the way in with almost nothing at the bottom sticking past the end of the box. Close the door on the air box and that's done. I tried the AC and the smell was definately better, but I think there was still a sort of smell there.
Disinfecting the AC Evaporator ...
I researched and apparently there can be mold growing on the AC evaporator which is in the heating and AC system within the dash. A lot of the web sites that discuss this for cars in general, recommend Lysol or another disinfectant spray to put shot into the fresh air intake. After researching the air flow for the Mini, and as may well be other cars, the filter that I just replaced goes between the fresh air intake and the fan. So what I decided to do is spray the bulk of the Lysol into the filter box that houses the the filter I had just changed. I sprayed on what is essentially the 'inside' of the car, defined by the filter, up and to the left into the fan. This is done with the car running and the AC on full blast as far as the fan. Do not try to reach the can up into the box, just spray in the general direction of the fan and the aerosol will travel. With the AC on, and the temperature set point all the way at the coolest setting, the fan will blow onto the AC evaporator and this Lysol aerosol should get on that. I sprayed a liberal amount in, closed the box and then sprayed a little bit in the fresh air intake located on the cowl at the base of the windshield with the hood raised. There will be some openings in an otherwise solid piece of plastic.
Plan on airing out the car for a long time and while you are doing this, have all widows and doors open so the Lysol does not accumulate too badly. I did this yesterday and drove the car this morning. There is a lingering smell of Lysol that I expect to dissipate after a couple of days. Hopefully the funky smell will be gone after that.
Below are two pictures that you may find useful/ interesting. The diagram from the Bently manual does not show the air box under discussion, but the photograph of the heating and cooling system model does.
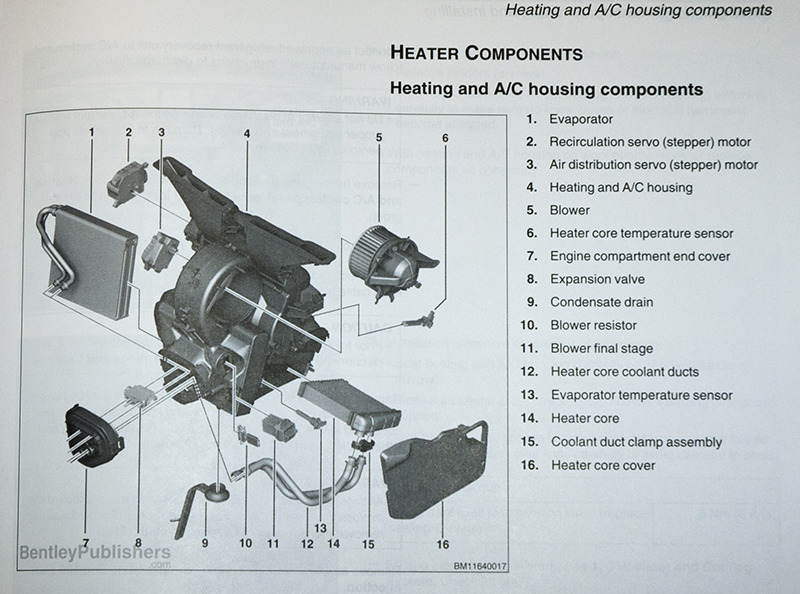
Diagram of Heating and Cooling System.

Model of Heating and Cooling System.
By TMTR May 7, 2018
By submitting your comment(s) using the form(s) on this website, you agree to the following:
- You grant the operator(s) of this website unrestricted permission to use your comment(s) publicly on this website unless you selected to make your comment a 'Private' comment as submitted on the comments form.
- For 'Public' marked comments, you grant the operator(s) of this website editing priviledges in so far as the operator(s) may selectively shorten the comment and and omit portions in an editorial way.
- Unless you specifically grant permission to add your optional email address, as enterred in the form, to our mailing list, your email address will not be utilized in any manner. Furthermore, the supplied email address will not be made public through any of our actions.
- You agree to provide relevant and appropriate comments as related to this website. Your comments should be of a manner which is constructive to the subject matter of this site. Your comments should refrain from use of inappropriate language.
- Not all comments which are indicated as 'Public' will be made publicly available on this site. The operator(s) of this site retain complete editorial judgement for which comments are to be added to this site. All comments are reviewed prior to posting.